- Published on
Install HACS on Home Assistant Docker Using Terminal
- Authors

- Name
- Simply Smart House
- Terminal Installation
- Setting Up HACS in Home Assistant
- Alternative Installation Methods
- Using HACS
- Conclusion
🎥 Follow along with the video tutorial below:
What is HACS?
HACS (Home Assistant Community Store) is an add-on for Home Assistant that offers a user-friendly interface for discovering and installing custom elements. Think of it as an app store for Home Assistant, but created by the community. With HACS, you can easily browse and install:
- Custom dashboards and cards
- Custom integrations for devices not yet supported by core Home Assistant
- Themes to personalize your Home Assistant interface
- Automations and scripts shared by the community
Why Use the Terminal Method?
The terminal method is the most universal and reliable way to install HACS on Docker. This method works on any system with Docker command-line access and is perfect for:
- Linux servers and remote systems
- Users comfortable with command line
- Headless installations
- When GUI methods fail or aren't available
Prerequisites
- Home Assistant running in Docker
- Terminal/SSH access to your Docker host
- A GitHub account (required for HACS authentication)
Terminal Installation
This method uses direct terminal commands to install HACS on any system with terminal access to Docker.
Step 1: Connect to your Docker container
First, you'll need to identify your Home Assistant container name and connect to it:
List your containers:
docker ps

Connect to your container (replace [YOUR_CONTAINER_NAME] with your actual container name):
docker exec -it [YOUR_CONTAINER_NAME] bash
Example:
docker exec -it homeassistant bash
Step 2: Download and Install HACS
Once connected to your container, run the HACS installation command:
wget -O - https://get.hacs.xyz | bash -
Step 3: Exit the Container
After the installation completes, exit the container:
exit
Step 4: Restart Home Assistant
For the changes to take effect, restart your Home Assistant container:
docker restart [YOUR_CONTAINER_NAME]
Example:
docker restart homeassistant
Setting Up HACS in Home Assistant
After installation and restart, you'll need to configure HACS within Home Assistant:
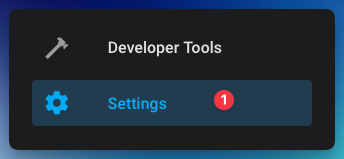
Step 1: Open Integrations
- Open your Home Assistant dashboard
- Go to Settings → Devices & Services


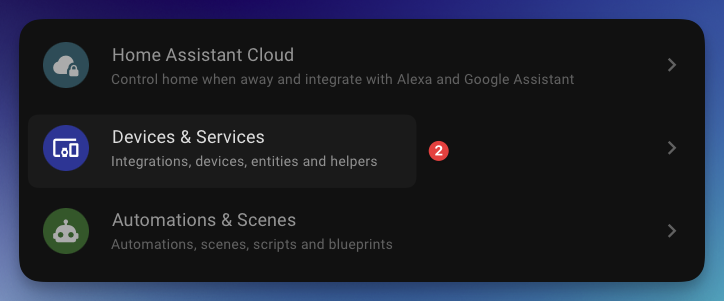
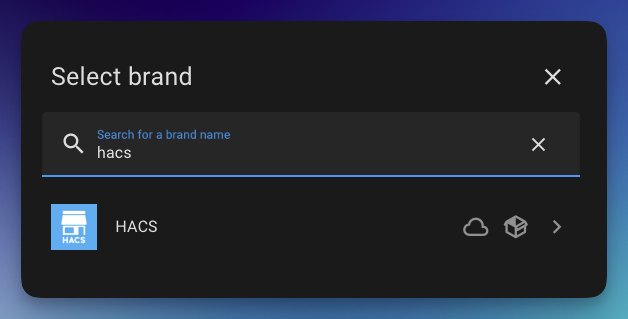
Step 2: Add HACS Integration
- Click the Add Integration button in the bottom right corner
- Search for "HACS" and select it

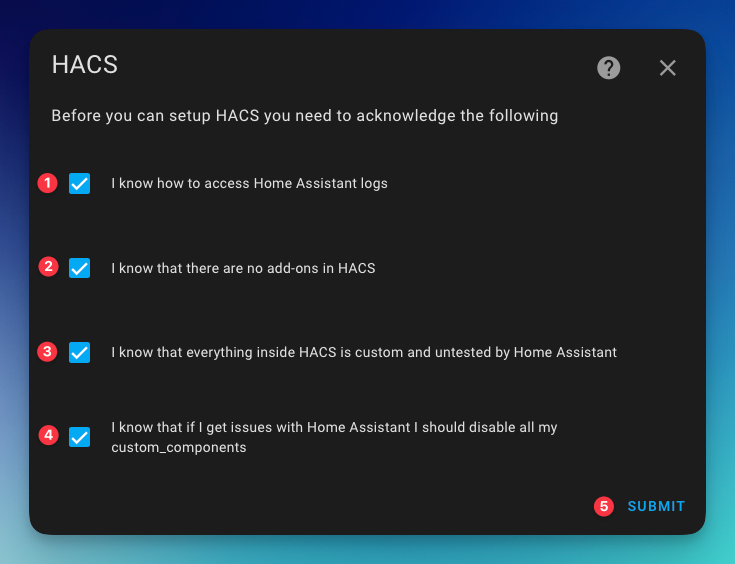
Step 3: Accept Terms and Conditions
Review and accept the HACS terms and conditions by checking all boxes, then click Submit.
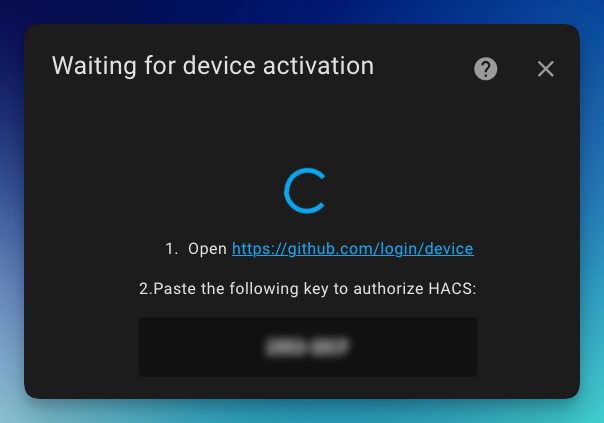
Step 4: GitHub Authentication
- Copy the device code shown on screen
- Click the link to open GitHub authorization
- Log in to your GitHub account if needed
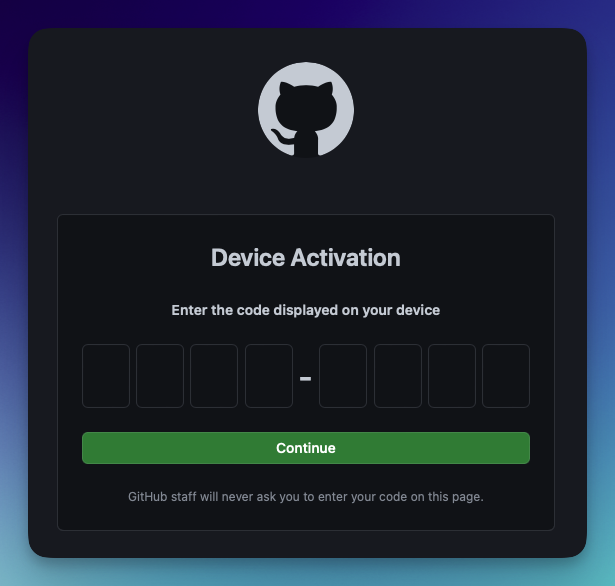
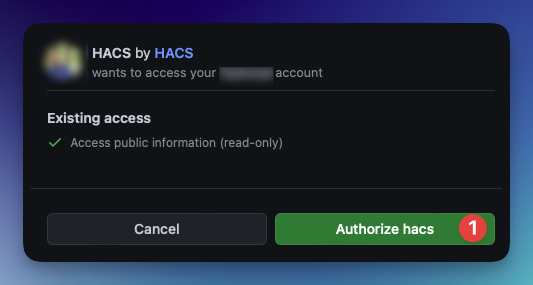
Step 5: Authorize HACS
- Paste the code you copied into the GitHub device activation page
- Click Authorize HACS
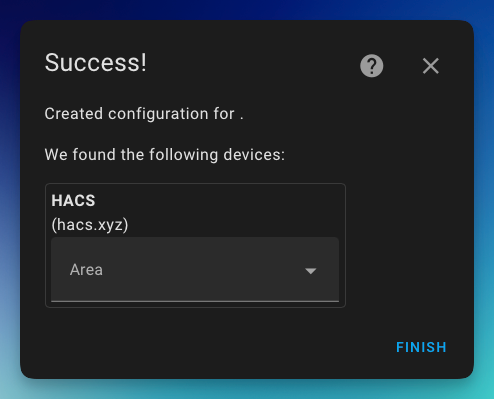
Step 6: Complete Setup
- Choose an area for the HACS integration (optional)
- Click Finish
Step 7: Access HACS
After installation, you should see the HACS icon in your sidebar.
Can't see the HACS icon? Perform a hard refresh of your browser:
- Windows/Linux:
CTRL+F5 - Mac:
CMD+SHIFT+R
Alternative Installation Methods
If the terminal method doesn't work for your setup, we have dedicated guides for other installation methods:
- Portainer Installation - For users who prefer a web-based GUI interface
- Synology Installation - Specifically for Synology NAS users with Container Manager
- QNAP Installation - For QNAP NAS users
Using HACS
Now that you've installed HACS, you can browse for:
- Integrations: Add support for devices and services not included in core Home Assistant
- Frontend: Add custom cards and elements to enhance your dashboards
- Themes: Change the appearance of your Home Assistant interface
Each element in HACS comes with its own documentation for configuration and use.
Conclusion
You've now successfully installed HACS on your Docker-based Home Assistant using the terminal method! This universal approach works reliably across all platforms and provides direct access to the installation process.
With HACS, you can expand Home Assistant's capabilities with community-created integrations, dashboards, and themes.
Explore the available components and enjoy customizing your smart home experience.
If you encounter any issues or have questions, feel free to leave a comment below!